Window Host Network Configuration
This section covers how to configure a static IP address and set up Jumbo frames on a chosen Ethernet adapter in Windows.
Note
Ensure you have administrative privileges on your computer to make these changes.
Configure Network Settings
Follow these steps to configure your network adapter:
Open Network Connections
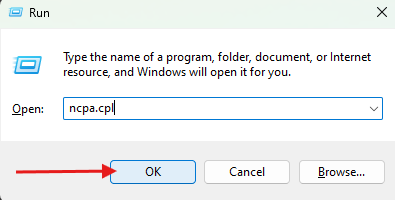
Press
Win + R, typencpa.cpl, and press Enter. This opens the Network Connections window where all network adapters are listed.
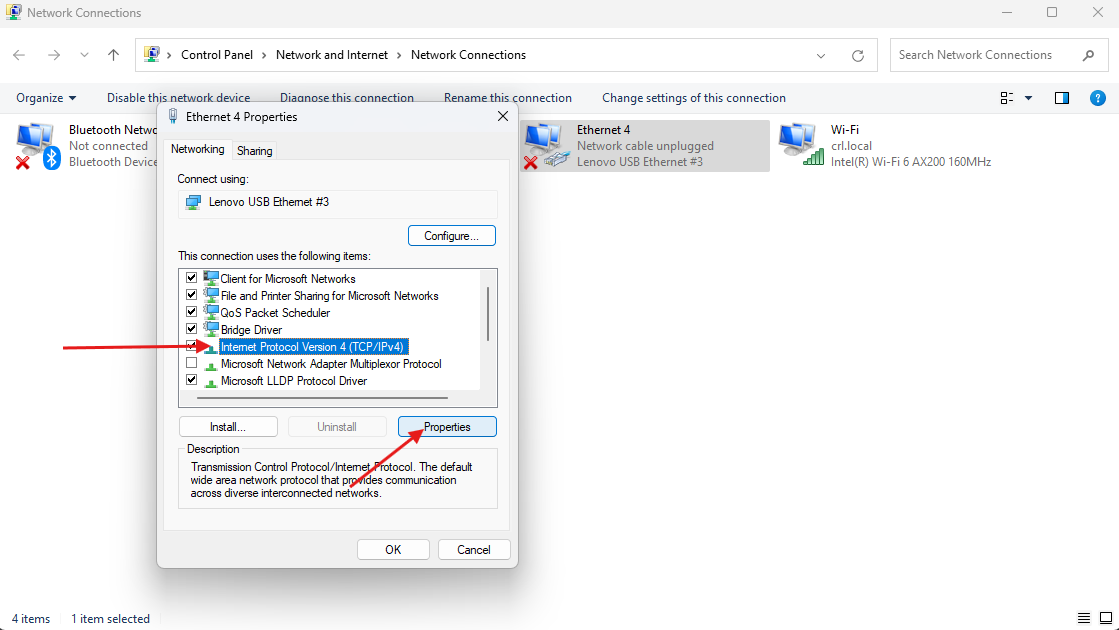
Identify Your Ethernet Adapter
Locate the Ethernet adapter you want to configure, typically named “Ethernet” or “Local Area Connection” followed by a number.
Configure a Static IP Address
Right-click the chosen adapter and select ‘Properties’, or double-click the chosen adapter.
Select ‘Internet Protocol Version 4 (TCP/IPv4)’ and then click ‘Properties’.
Choose ‘Use the following IP address’:
IP Address:
10.66.171.100Subnet Mask:
255.255.255.0Leave the rest blank
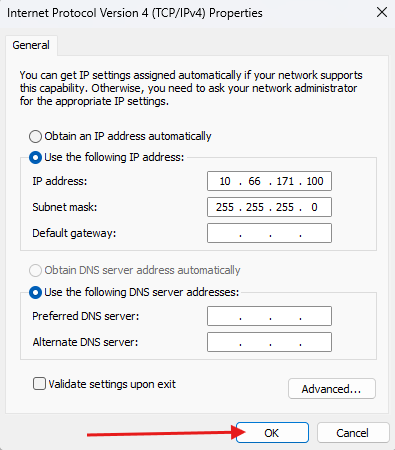
Click ‘OK’ to save the settings.
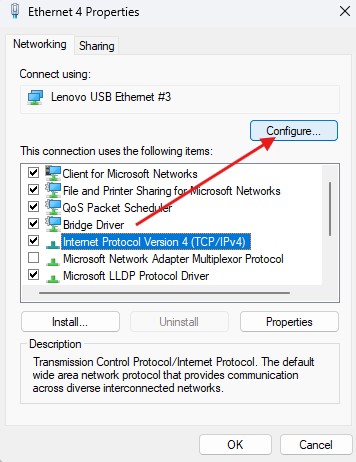
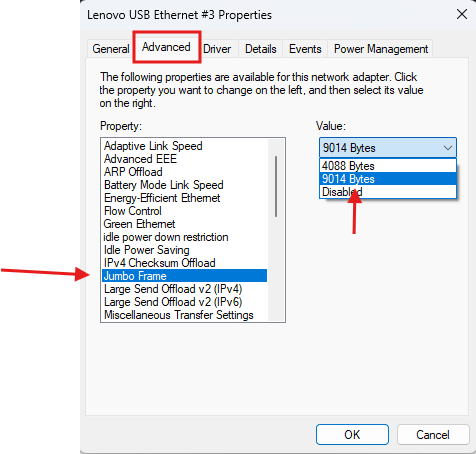
Enable Jumbo Frames
Go back to the properties of your Ethernet adapter.
Click on ‘Configure’ tab as shown below, then select the ‘Advanced’ tab.
Scroll to find ‘Jumbo Frame’. Select it and choose a suitable value, like
9014 Bytesfrom the drop-down menu. Note that not all adapters support Jumbo Frames, and available settings can vary. If not available, try with different ethernet adapters or devices.
Note
Changes like these might disrupt network connectivity if done incorrectly. Make sure the IP address and Jumbo Frame settings are compatible with your network.
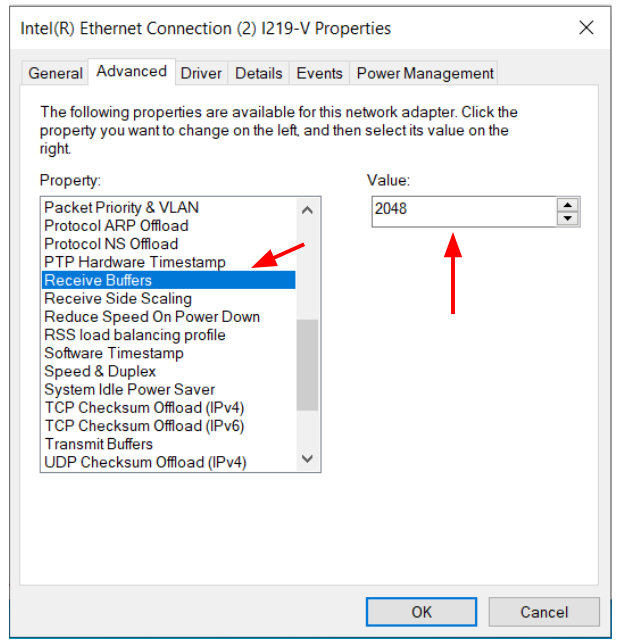
Increase Receive Buffers
Go back to the properties of your Ethernet adapter.
Click on ‘Configure’ tab as shown below, then select the ‘Advanced’ tab.
Scroll to find ‘Receive Buffers’. Select it and enter a large value like
2048.
Done. Try to connect to multisense using the MultiSense Viewer or LibMultiSense.