MultiSense Viewer
Multisense Viewer is an application designed to get users familiar with the camera and its operation. It allows a user to quickly set up the sensor, find settings that work, and get a sense of how the sensor performs in their environment. The application is open sourced on Github at: MultiSense Viewer.
Installation
Binary releases for the MultiSense Viewer application can be found below. Binaries are available for Windows and Linux. Follow the instructions below for installation.
Windows
Install
Perform one of the following steps:
Download and run the Windows installer: MultiSenseSetup.exe.
(Optional) Download the portable version: MultiSense_viewer.zip.
Uninstall
Run
unins000.exein the installation folder.
Ubuntu
Download and install the appropriate package for your Ubuntu version:
Ubuntu 20.04: multisense_1.1-6_amd64_ubuntu20_04.deb
Ubuntu 22.04: multisense_1.1-6_amd64_ubuntu22_04.deb
Ubuntu 24.04: multisense_1.1-6_amd64_ubuntu24_04.deb
Install the downloaded package using your default package manager or via terminal:
sudo dpkg --install <path-to-multisense-deb>
Launch through the start menu or run the start script:
/opt/multisense/start.sh
Uninstall
Uninstall with your package manager or run the following command:
sudo dpkg --remove com.carnegierobotics.multisense
For more detailed information, refer to the full documentation provided with the release.
Connecting to the MultiSense
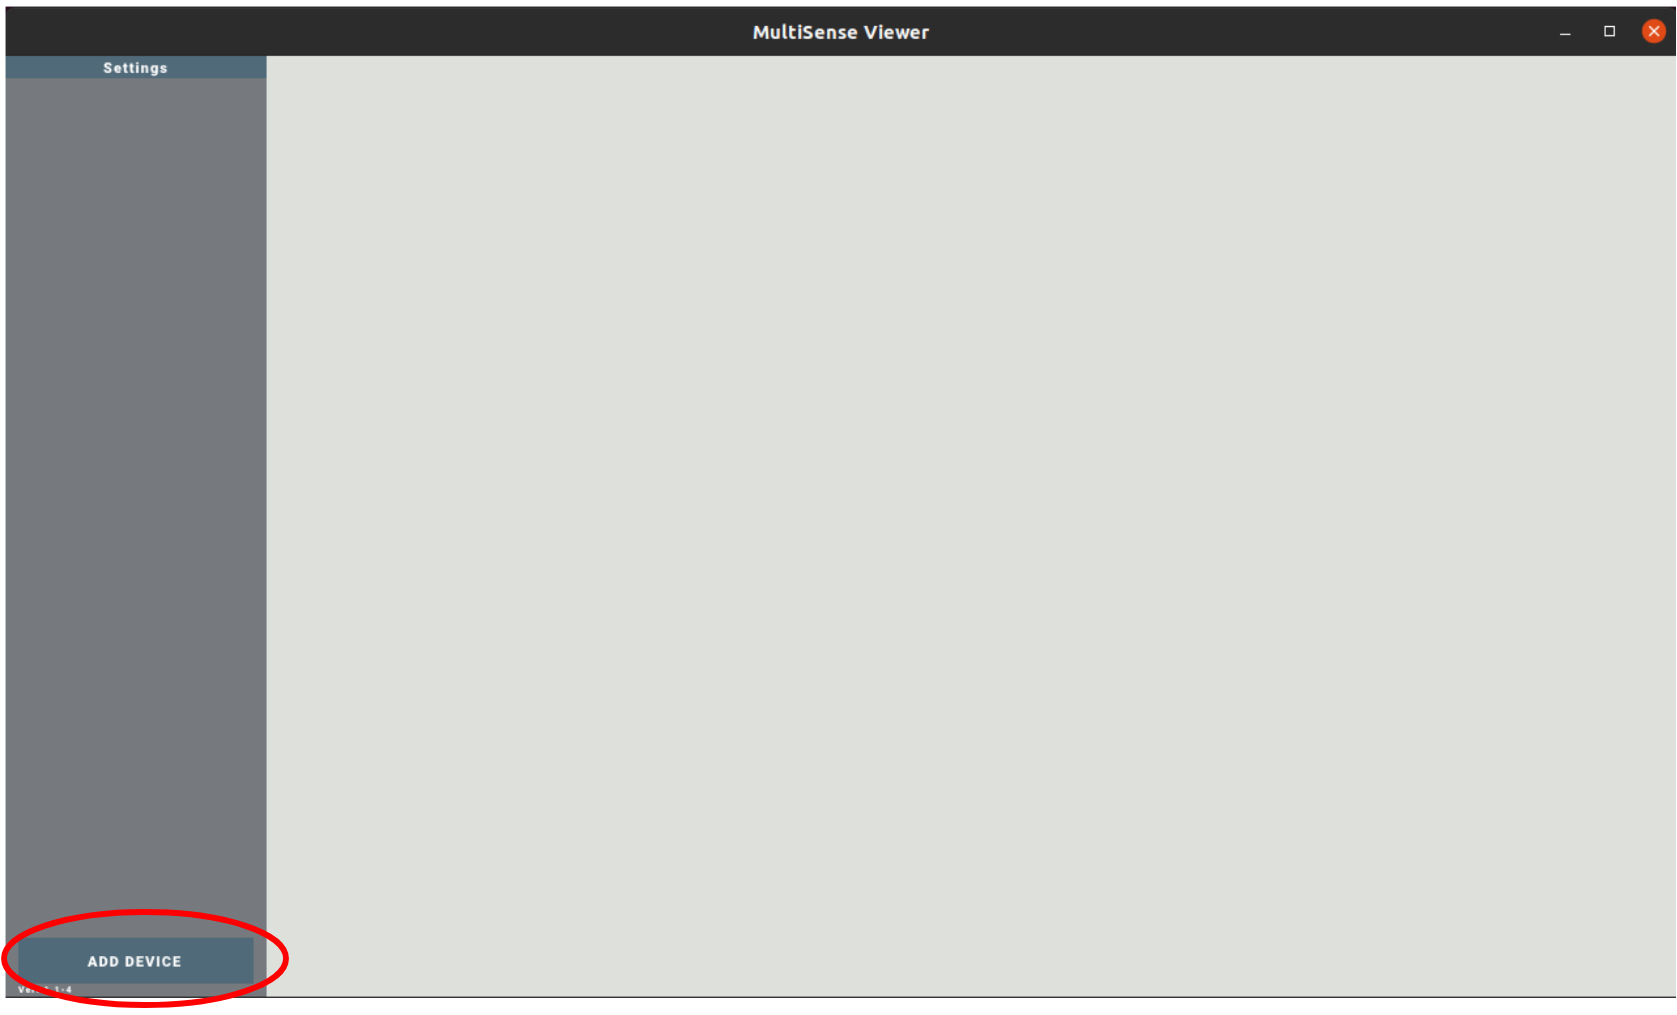
The opening screen of Multisense Viewer consists of one option:

To get started, click “add device” in the bottom right corner.

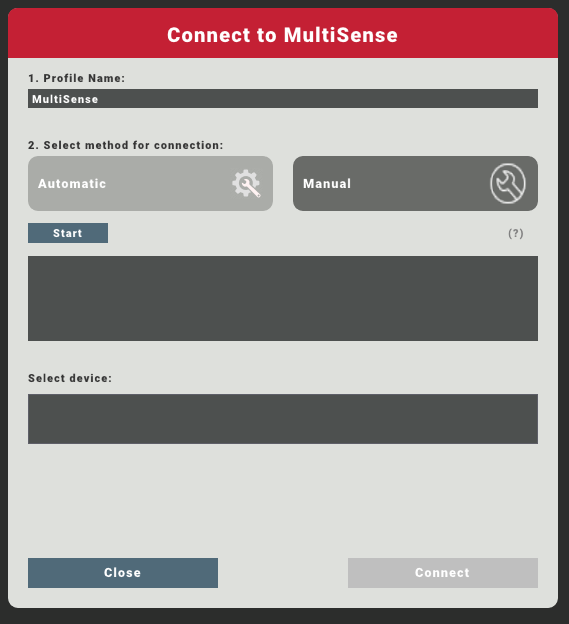
When clicking “add device” the following screen pops up, allowing the user to configure their network manually or automatically, depending on the user’s preference. In manual mode, the user needs to set up their network by themselves, including setting up Jumbo Frames (increasing the size of the MTU) and selecting the network adapter. Ensure you have manually configured your host machines network interface using the Windows Host Network Configuration Guide or Linux Host Network Configuration Guide docs

Warning
Automatic network configuration in is a beta development feature. We recommend users manually configure their network interface using the Windows Host Network Configuration Guide or Linux Host Network Configuration Guide
In automatic mode, the Multisense Viewer will configure the computer’s network setup automatically. Simply click “start” to begin. After clicking start, a pop-up will ask for administrative privileges so that Multisense Viewer can change the network adapter settings to a fixed IP address and to change the MTU. These settings will be returned once the program has been closed.

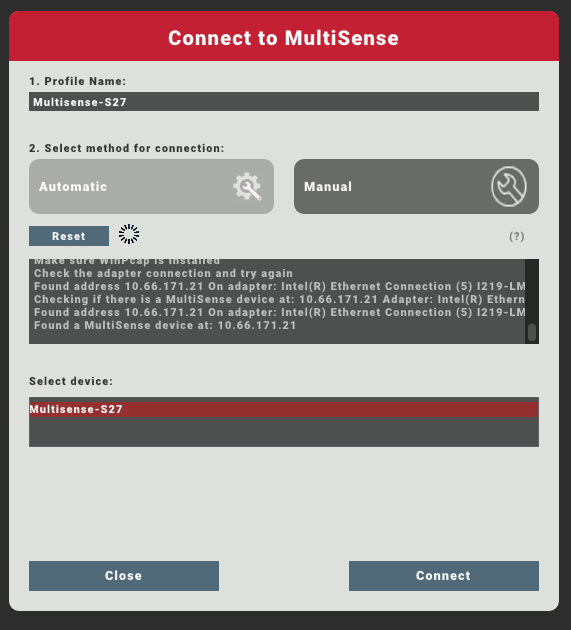
After about a minute, if a device is detected on the network, it will appear in the “select device” region. Here, there’s a Multisense S27 attached to the computer.

After clicking “Connect” the camera will appear in the upper left hand corner of the screen. It will say “connecting” while establishing a connection to the camera.
Viewing Live Data

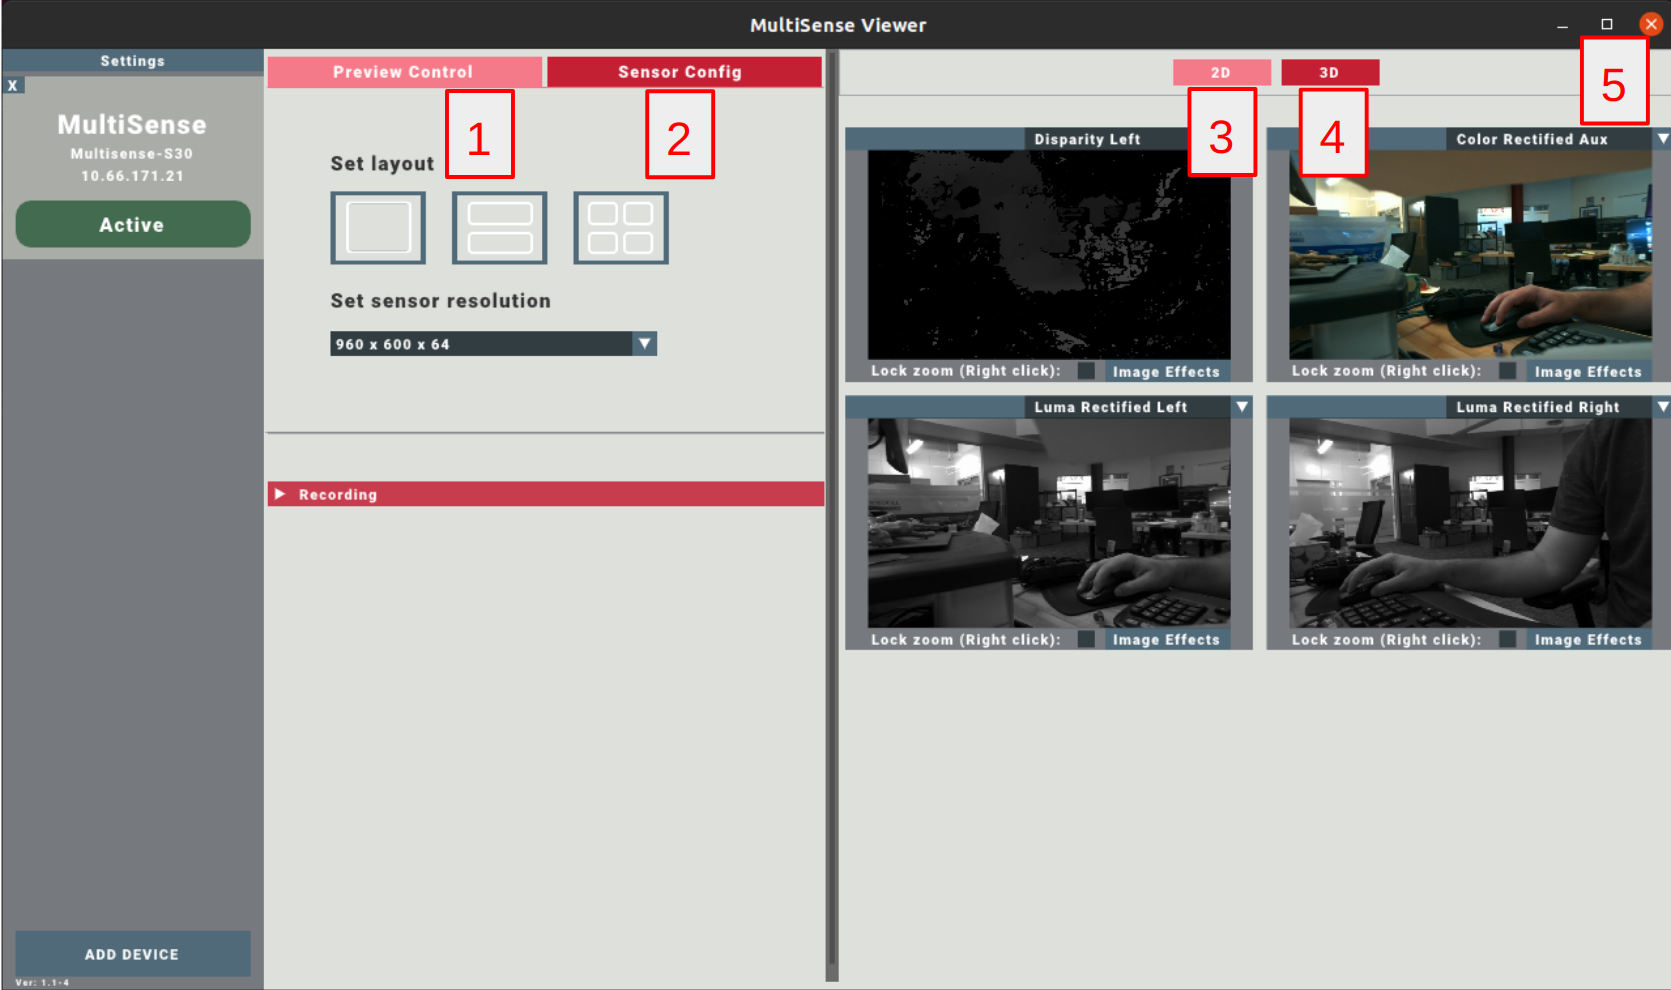
Here is the main screen of the Multisense Viewer.

The following important screens are available:
The Preview Control. When selected, this allows the user to configure the way that the preview is set up, and the fundamental camera mode of operation as well as the option to record the image stream
“Sensor Config” is a separate window that allows the user to choose how the sensor is configured (frame rates, exposure settings, and similar).
2D, means that the viewer is configured to show images (disparity images and left, right, and color, if equipped) images from the camera. These are the actual outputs of the camera.
3D allows the user to view the 3D data from the camera as a point cloud. The point cloud is generated on the user’s PC
The drop-down menu(s) at the top right corner of the image box tell the user which of the camera’s image output streams are being shared with the computer.